Quickstart
This guide helps you create your first meeting note in ScribX. At the end, you will have:
- A note for one meeting — captured live, recorded on your device, or uploaded
- Its transcript, translation and AI summary, each line linked to the moment it was said
- A clear idea of which way to start next time
It takes about five minutes. You don't need a credit card — the Free plan is enough.
ScribX counts use in credits: about 1 credit per minute of a meeting that the ScribX bot records. The Free plan gives you 200 credits a month. You can see what is left at the bottom of the sidebar. See What is a credit?
Before you begin
- A ScribX account — sign up free, or sign in with Google, Microsoft or your email
- One of these: a meeting link (Google Meet, Zoom, Microsoft Teams or SkyOffice), a microphone, or a recording file you already have
The browser extension is optional — it adds an in-call panel and live captions, but everything below works from the web app alone.
1. Open a new note
Sign in at platform.scribx.app and press New note at the top of the sidebar. Every meeting in ScribX is a note, and an empty note offers every way to start one:
- Paste a meeting link and click Invite ScribX — for a Google Meet, Zoom, Microsoft Teams or SkyOffice call;
- Record on this device — your microphone (or a browser tab), for a meeting in the room or anything with no link;
- Upload recording — a file of a meeting that has already happened.
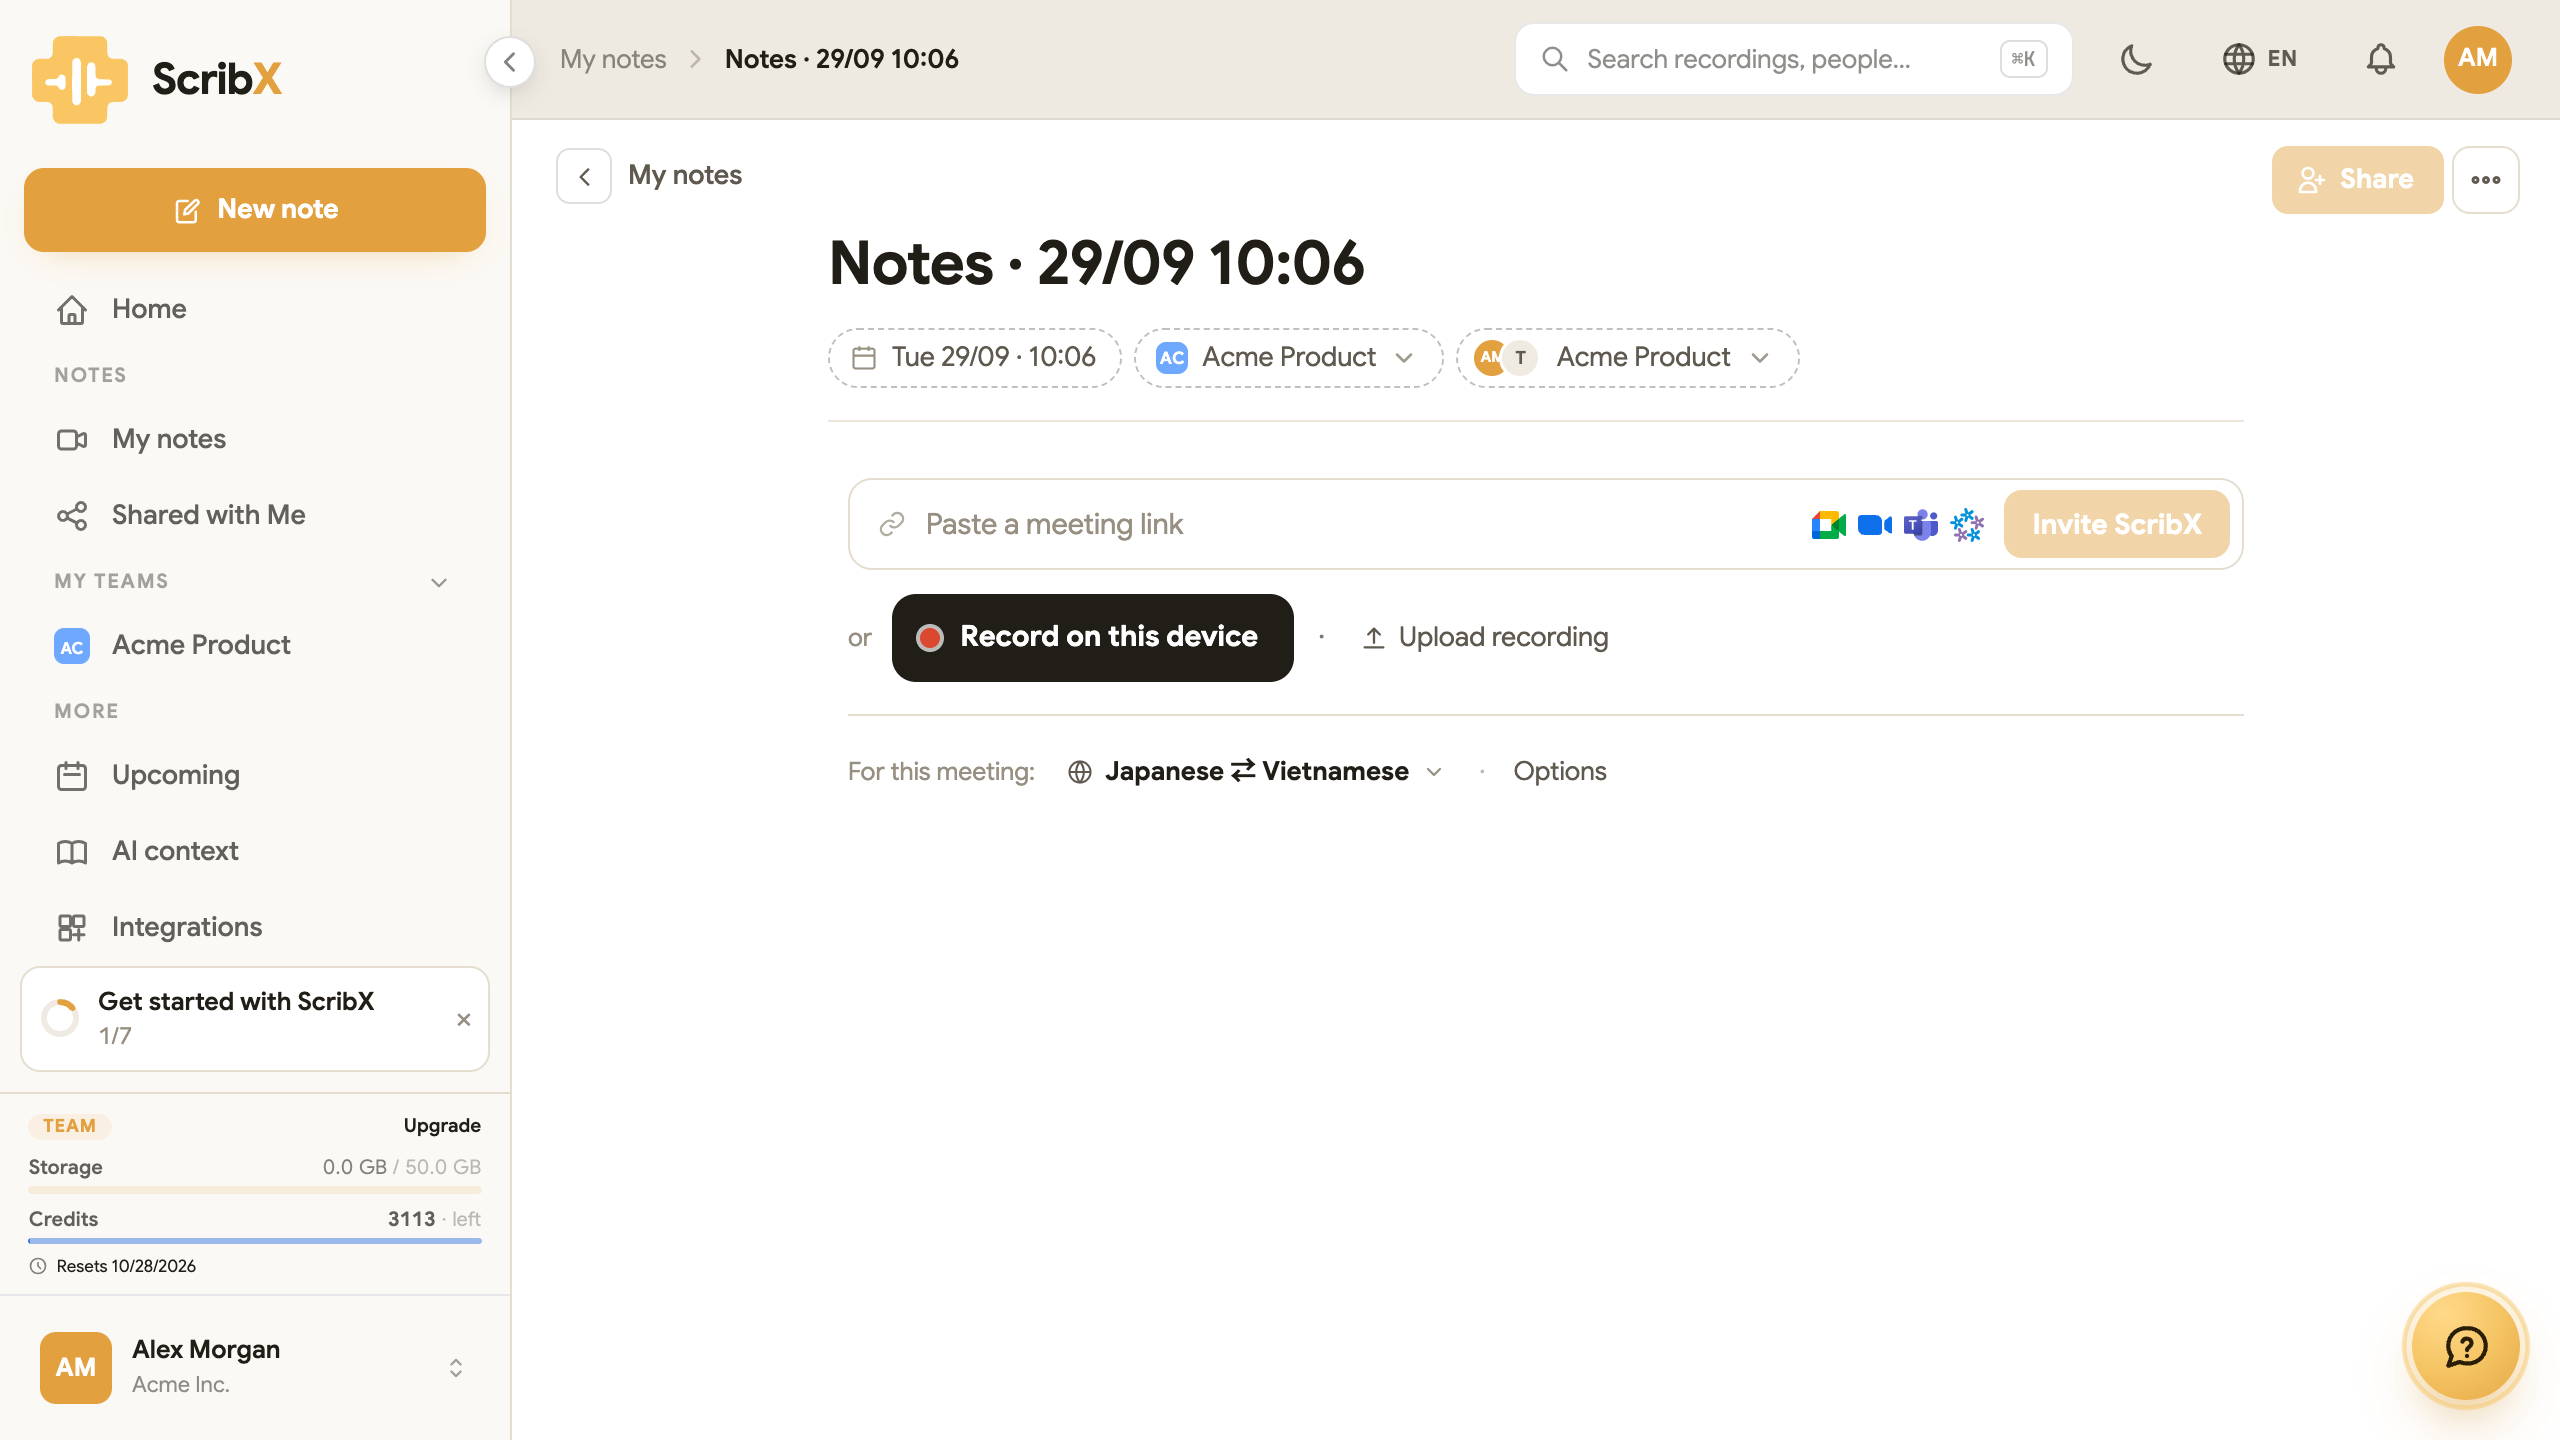 1234
1234- 1Paste a meeting link, then Invite ScribX
- 2Record on this device — your microphone, or a tab
- 3Upload recording — a file you already have
- 4For this meeting — languages and Options
2. Set the languages (optional)
Under the start buttons, find the line For this meeting:. Next to it is the language button. It shows the languages of the meeting, for example Japanese ⇄ Vietnamese.
- To keep the languages, do nothing.
- To change them, click the language button. Set My language (the language you speak and read). To show a translation for other people, click + Translate for others to read and add their languages. ScribX translates for them during the meeting.
Click Options for more settings: how ScribX transcribes (ScribX AI or the meeting platform's own captions), whether the audio is kept, a context, a short meeting brief and the summary template. See Meeting languages.
3. Start the meeting
Pick the way that fits the meeting — all three end in the same kind of note.
- It has a link
- It's in the room
- It already happened
Invite ScribX — a ScribX participant joins the call, records and transcribes, and leaves when the meeting ends. You can close the tab.
Before you invite ScribX to a Zoom meeting, connect your Zoom account once: in the sidebar, click Integrations, then Zoom, and sign in to Zoom. See Connect Zoom. Google Meet and Microsoft Teams need no extra setup.
- Paste the meeting link into the field at the top of the note.
- Click Invite ScribX.
- In the meeting, admit the ScribX participant if the host has a waiting room. If nobody admits it, ScribX waits up to 15 minutes and then leaves. A bot that was never let in uses no credits.
The note shows the bot's progress — joining, waiting to be admitted, in the meeting — and the live transcript as soon as it is in. See Send a bot and Manage the bot.
Record on this device — no link, nothing joins a call. For an in-person meeting, a phone call on speaker, or a call in another tab.
- Press Record on this device. Recording starts straight away.
- Choose what to listen to in the small panel: the microphone, and a tab or window if the meeting is in your browser.
- Confirm the consent check the first time.
- When the meeting is over, press End recording.
See Voice recordings.
Upload recording — hand ScribX an audio or video file of a meeting it wasn't in.
- Press Upload recording.
- Drop the file on the panel, or click to choose one. The panel says what your plan allows.
- Keep the page open until the Upload step is done; converting, transcribing and summarizing carry on without you.
See Upload a recording.
4. Read the summary
When the meeting ends — or the upload is transcribed — the summary is written within seconds, in the language you read in.
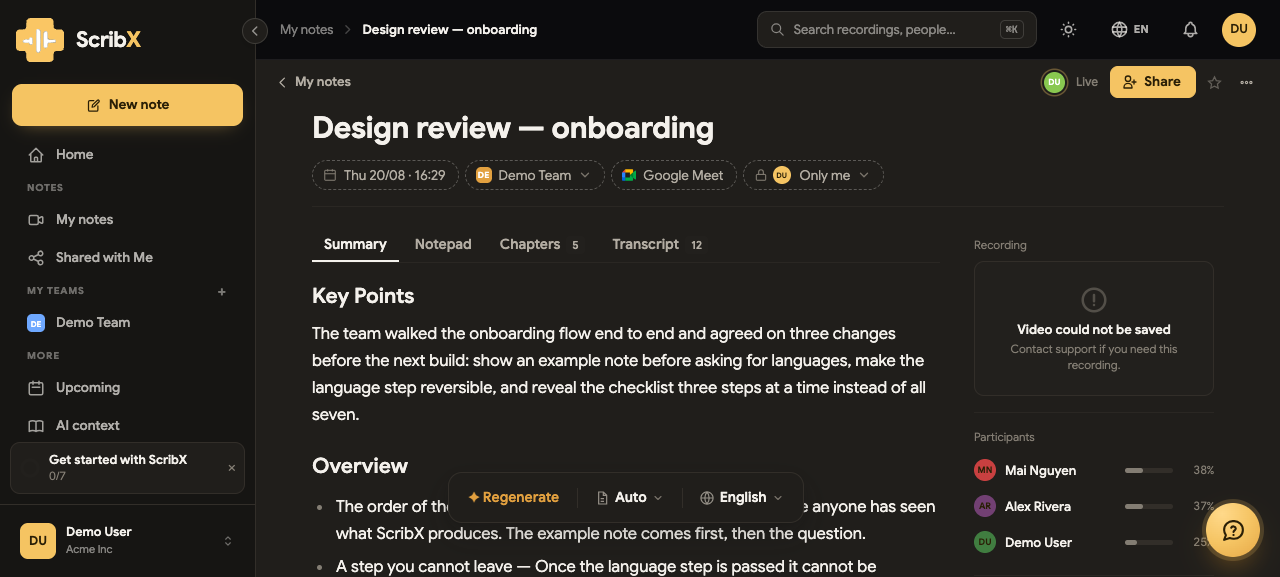 12
12- 1Summary · Notepad · Chapters · Transcript
- 2When it was, which team, where it came from, who can see it
- Summary — written with the General template: a short summary, the decisions and the action
items. Each one links to the moment it was said.
- To change the text, click into the summary and type. It works like a normal document editor. Your changes are saved automatically.
- To write the summary again with another template, click the template button above the summary (it shows General). A menu headed Regenerate with… opens. Choose another summary template, or ScribX layout (ScribX chooses the sections itself; 10 credits).
- Transcript — every line, with its speaker, time and translation. Click a timestamp to play that moment.
- Notepad — anything you typed during the meeting.
The note is also in My notes, at the top.
At first, you work in your own space, and new notes are saved there. To work with a group or for a client, click Create team in the sidebar. Each team has its own list of notes. My notes marks the notes that are Not in a team yet, so you can move them into a team later. See Teams, projects & roles.
🎉 That's it
You have captured a meeting and read its summary. Next, you can:
- Share it — send the note to teammates or a public link.
- Make future summaries more accurate — add a context & glossary so names and acronyms come out right.
- Let ScribX join meetings for you — connect your calendar and ScribX joins scheduled meetings on its own.
- Work from inside the call — install the extension for the in-call panel and live captions.
- Finish the checklist — Get started with ScribX in the sidebar has seven steps. You get extra credits when you finish them. See Your first week.
What's next?
- Choose how to capture — which way to start, and what each costs
- The note page — everything on a note, during and after the meeting
- My notes — find, search and organize everything you capture