Context & glossary
ScribX only hears the audio. It does not know your projects, your customers or your product names. AI context lets you tell it. Then summaries and translations are more accurate.
AI context has two main tools. They do different jobs:
| Tool | What you add | What ScribX does with it | Example |
|---|---|---|---|
| Context | Background text or documents | Reads it when it writes the summary and translates | "Lighthouse is our new onboarding app. Mai leads it. The launch is in March." |
| Glossary | A list of single words and names | Spells them correctly and never translates them | Lighthouse, Mai Tran, ARR |
Use Context to explain what the meeting is about. Use the Glossary for words ScribX must spell right.
Open AI context
- In the sidebar, click AI context (under MORE).
- At the top, choose who it is for: Personal (only you) or one of your teams (everyone in it).
- Choose a tab: Context, Summary Templates or Glossary.
The Summary Templates tab is explained in Summary templates.
The Context tab
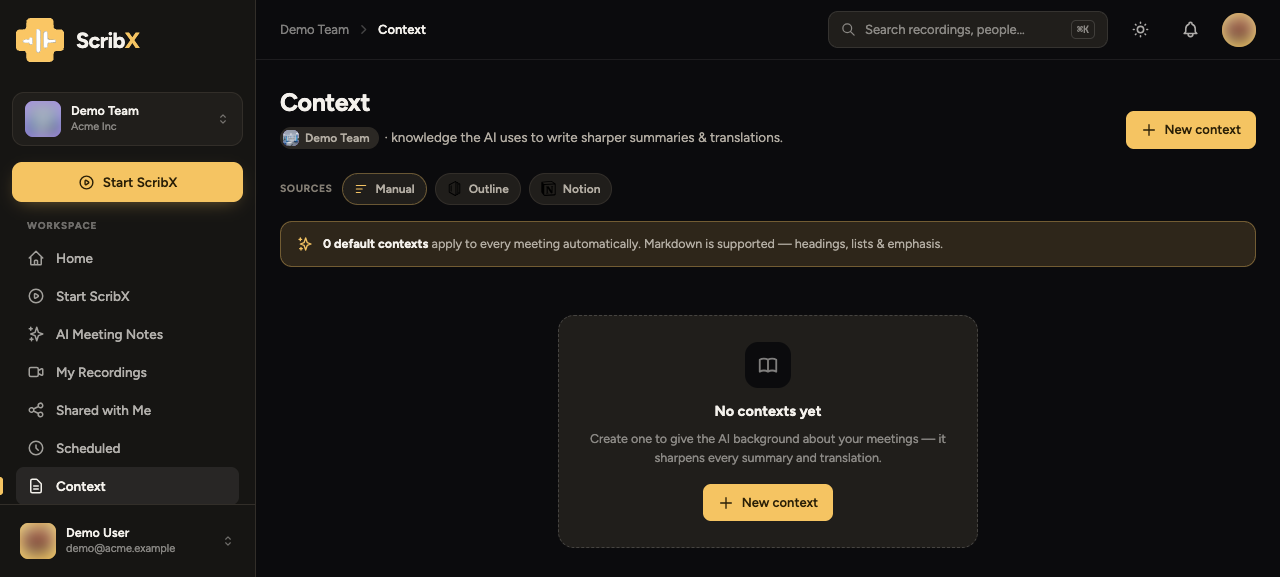 1234
1234- 1Personal, or one of your teams
- 2Context · Summary Templates · Glossary
- 3Add a new context
- 4Use in every meeting
Add a context
You can add context in three ways:
- Manual — type the text yourself. You can use simple formatting (Markdown): headings, lists, bold text.
- Outline — link documents from Outline.
- Notion — link pages from Notion.
To link Outline or Notion, first connect your account in the sidebar → Integrations. See Integrations. Only you can browse your connected account.
Use a context in every meeting, or in one meeting
- Turn on Default — applies to every meeting. ScribX then uses this context in every meeting of that team.
- Leave it off to use it only when you choose. Before a meeting, open the meeting's options and pick it under AI context. After a meeting, open the note and click Add context in the right-hand panel.
Context helps new summaries. If you add context after a meeting, create the summary again from the template button on the write-up to use it.
A short background text, marked as default, is often enough. You can type Markdown; the preview shows the formatted text:
- Markdown
- Preview
**About Lighthouse**
Lighthouse is our new client onboarding app. It launches in March.

**People**
- **Mai Tran** — Product Lead. Decides on scope.
- **Alex Kim** — Engineering Lead.

**This quarter**
We focus on the billing integration with Northstar.
About Lighthouse Lighthouse is our new client onboarding app. It launches in March.
People
- Mai Tran — Product Lead. Decides on scope.
- Alex Kim — Engineering Lead.
This quarter We focus on the billing integration with Northstar.
The Glossary tab
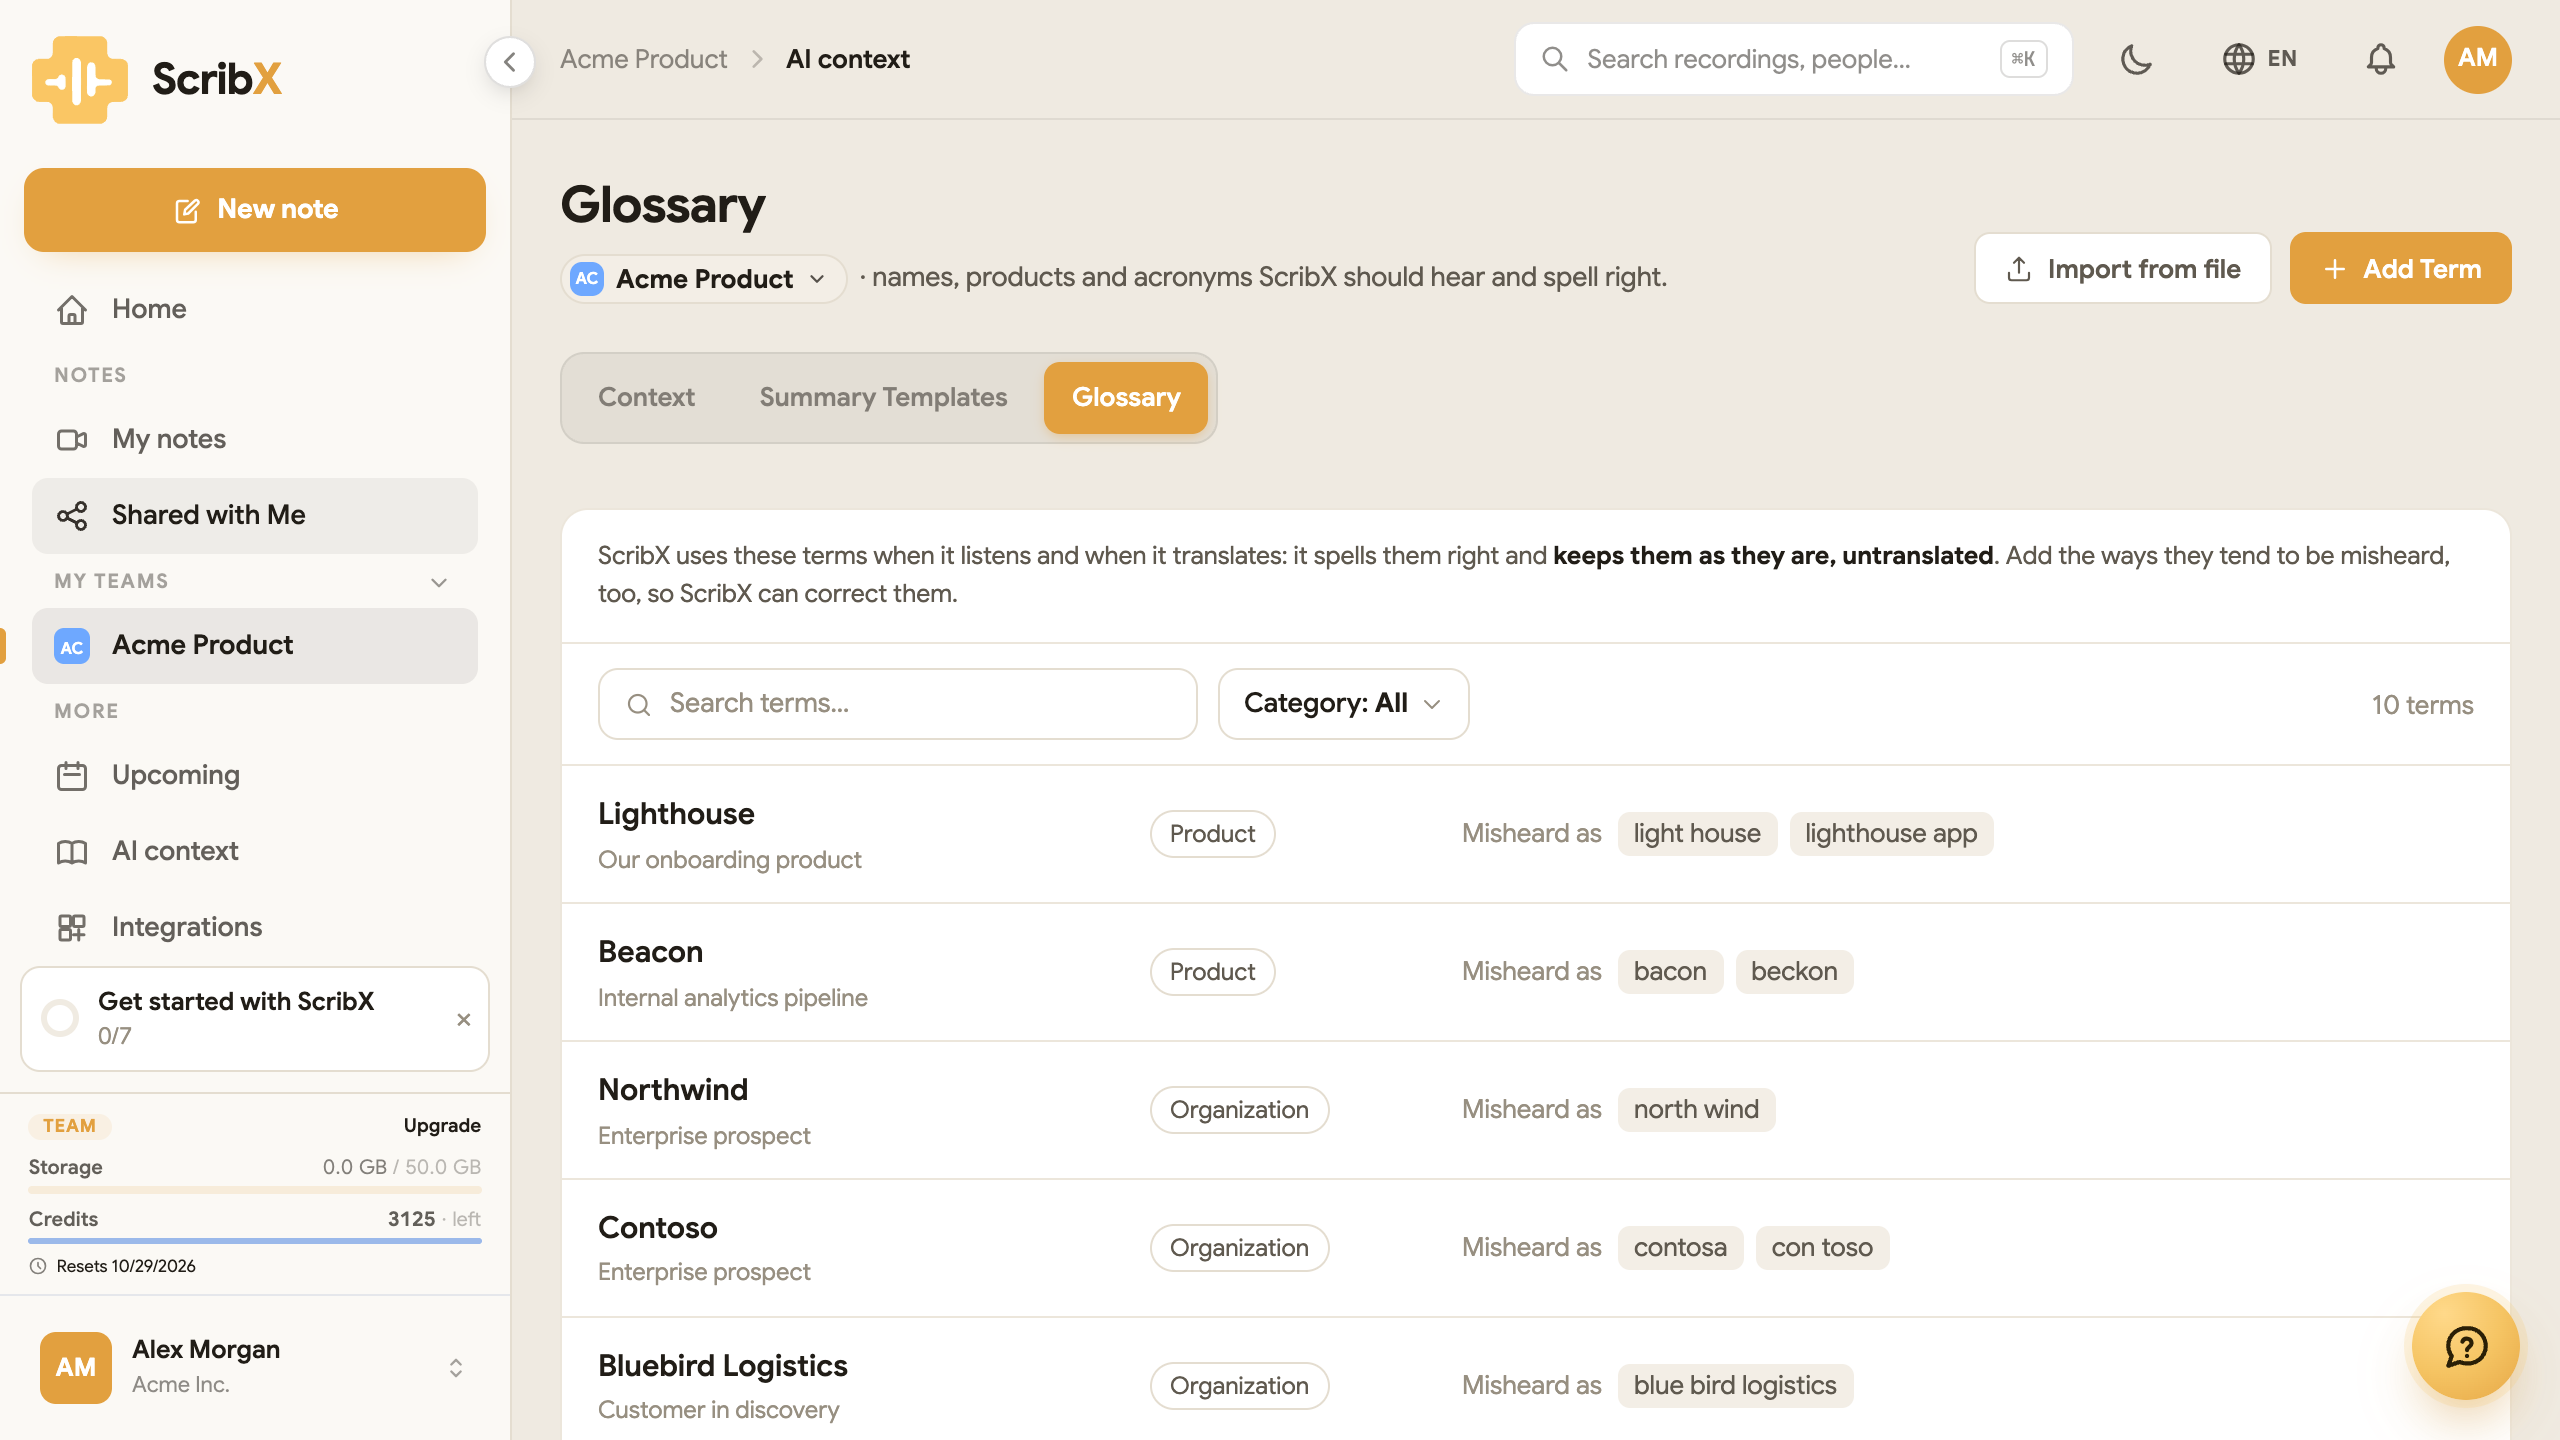 1234
1234- 1Add Term — or Import from file
- 2Filter by category
- 3The term's category
- 4Misheard as — what ScribX corrects
The glossary is a list of words ScribX must get right. ScribX uses it in two ways:
- When it listens, it spells these words correctly.
- When it translates, it keeps these words exactly as they are.
Each term has:
- The term, written the correct way, and a short description of what it is.
- A category: Product, Person, Acronym, Organization or Other. Use Category: All above the list to show one category only.
- Misheard as — wrong spellings that ScribX often hears, for example "light house" for Lighthouse. ScribX replaces them with the correct term.
- Who uses it — only you, this team, or the whole organization.
Add terms
- Click Add Term to add one term.
- Click Import from file to add many terms from a CSV or Markdown file. The sample files show the format.
- To change or delete a term, move the mouse over it and use the buttons that appear.
Your plan limits how many terms your organization can have: 25 on Free, 100 on Pro and Team, no limit on Enterprise.
A short list works better than a long one. Add the words ScribX is most likely to get wrong: product names, people's names and short forms like "ARR".
Where ScribX uses context and the glossary
- The write-up, with any summary template — and the "what this means for us" part of ScribX layout.
- Transcript translation.
- A meeting's options (AI context and Meeting brief), and the AI context section on the right side of the note page.