In-meeting captions & pop-out
ScribX can show live captions over your meeting video, like subtitles in a film. Each caption shows what was said and, below it, the translation. You can move the captions, change how they look, and open the meeting in a larger, separate window.
Before you start
- You join the meeting in your browser: Google Meet, or Zoom in the browser. The captions do not work in the Zoom or Teams desktop app.
- The ScribX extension is installed and you are signed in.
- ScribX is capturing the meeting. See Capture from the extension.
Where to find the controls
- The ScribX bar. A narrow bar with the ScribX logo sits on the edge of the meeting page. Move the mouse over it to see the button labels.
- The ScribX side panel. It opens next to the meeting. To open it, click Open sidebar on the ScribX bar.
- The extension settings. Click the ScribX icon in your browser toolbar, then click the gear icon (Settings). See Extension settings.
Turn captions on or off
Use one of these:
- On the ScribX bar, click Captions in meeting.
- In Google Meet, you can also use the side panel: under the ScribX logo, click the captions icon ("Show captions over video").
Click the same button again to hide the captions. You can also move the mouse over the captions and click × (Hide captions).
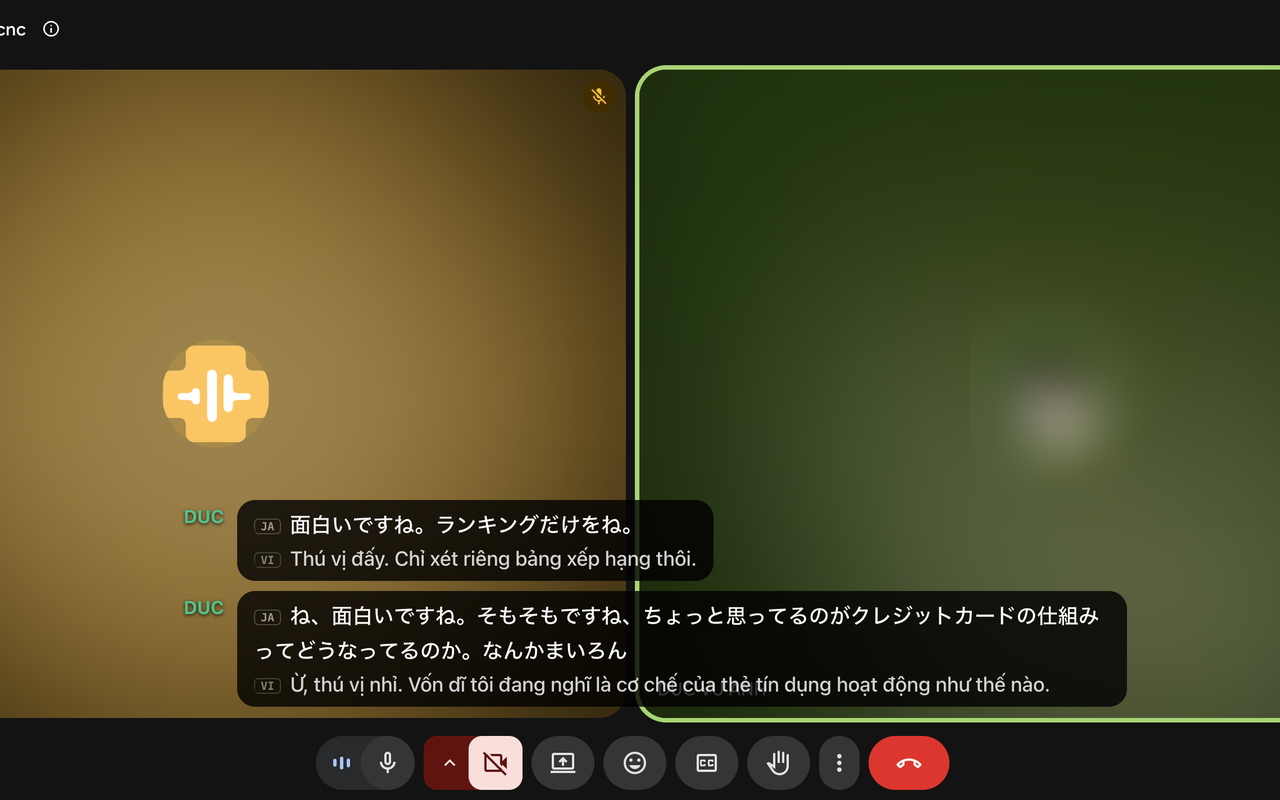
If you want captions every time, turn on Enable in-meeting captions in the extension settings.
Move the captions and change the view
Move the mouse over the captions. A small toolbar appears above them:
- Move — drag this button to put the captions anywhere over the video.
- Latest — show only the newest lines, like subtitles.
- Paragraph — show the lines together as a paragraph.
- Gear icon (Caption appearance) — open the look and language settings (see below).
- Pop out icon — open the meeting in a separate, larger window (see below).
- Dock to bottom — put the captions back at the bottom of the video. This button appears after you move the captions.
- × — hide the captions.
To make the caption box larger or smaller, drag its edge.
Customize how captions look
Click the gear icon in the caption toolbar. You can change:
- Languages to show — click the languages you want to see. Click a language again to hide it.
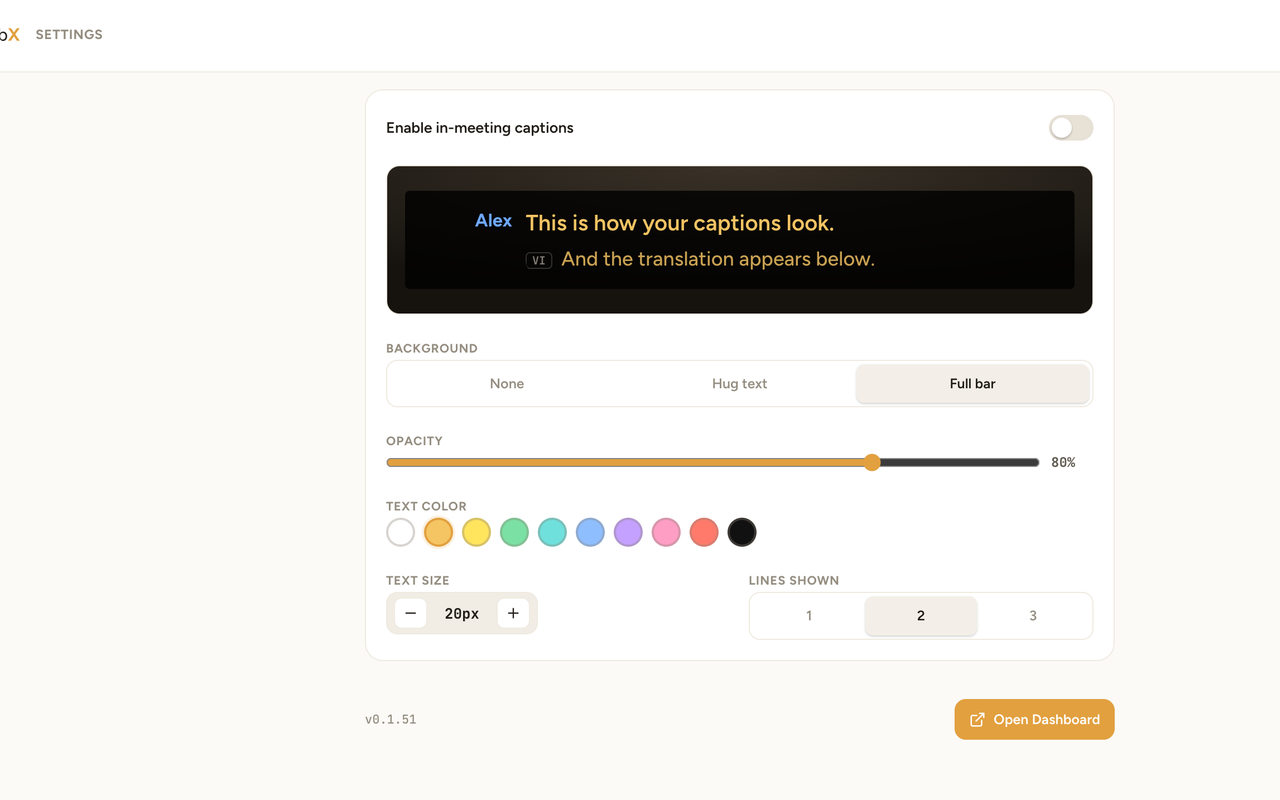
- Background — Hug text (a box around the text only), Full bar (a bar across the video) or None.
- Opacity — how solid the background is. This shows when a background is on.
- Text edge — None, Shadow or Outline. This shows when the background is None. It helps you read white text over a bright video.
- Text color — click a color.
- Text size — click − or +.
ScribX remembers these choices for your next meetings.
The same settings are in the extension settings, with a preview. There you can also choose Lines shown (1, 2 or 3).
Open the meeting in a separate window
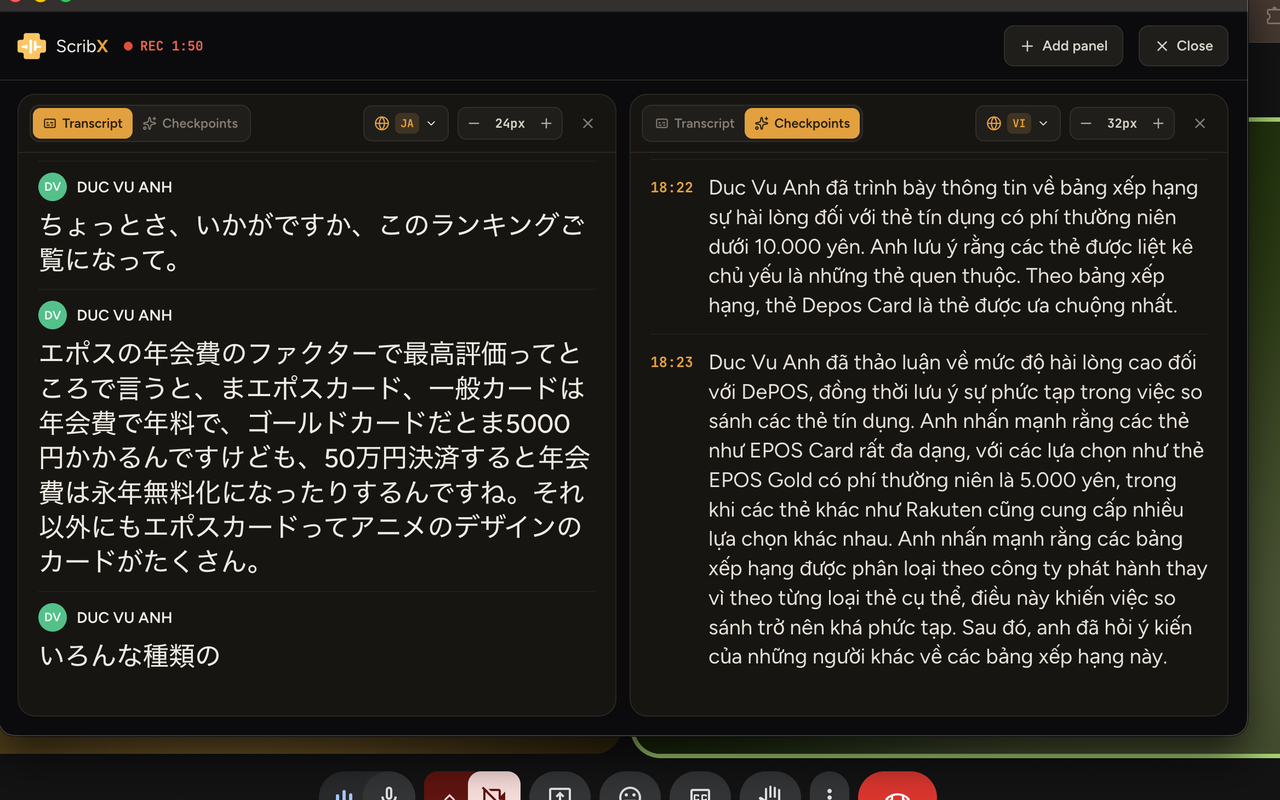
Click the Pop out icon in the caption toolbar, or the pop-out icon at the top of the side panel. A new, larger window opens. You can put it on a second screen, or keep it visible while you share your screen. See Focus mode & panels.
Live captions without a bot (Google Meet only)
In Google Meet you can also use Live captions. In this mode no bot joins the call. ScribX reads the captions that Google Meet makes and shows them in the side panel, with a translation. It is fast and private, but less accurate than a ScribX bot. It does not make a live summary.
- On the ScribX bar, click Live captions.
- Turn on Google Meet captions. Click CC in the Google Meet toolbar. ScribX shows Captions detected when it can read them.
- Spoken language. Pick the language people speak. It must match the caption language in Google Meet. To change the Google Meet language, click Change Meet's caption language.
- I want to read in. Pick one or more languages to read. Leave it empty to see only the original.
- Click Start live captions.
The note is saved to your library after ScribX reads the first caption. Live captions cost no credits. See plans & billing.
If the captions don't appear
- Make sure ScribX is capturing the meeting. The side panel shows a red recording dot and a clock.
- Click Captions in meeting on the ScribX bar again.
- For Live captions, check that CC is on in Google Meet.
- See Troubleshooting the extension.